I’ll freely admit that when it comes to new technology I’m a bit of a laggard. I’m not one to rush out and buy the latest gadget. I generally work on the principle that if it isn’t broken, don’t fix it.
Up until now I’ve been using a 17″ CRT monitor for photo editing that was calibrated with an X-Rite MonacoOPTIX XR monitor calibrator. I was using the X-Rite quite happily until I upgraded the computer a while back to Windows 7 operating system and found out that there was no Windows 7 support for the MonacoOPTIX. I tried all the workarounds suggested on web forums to get the MonacoOPTIX working with Windows 7 but everything I tried just crashed the computer.
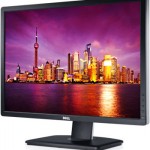
 Last week my CRT died and forced me to buy a replacement monitor. After reading review sites I opted for a 24″ Dell UltraSharp U2412M LCD TFT IPS monitor with 1920 x 1200 resolution. I’m very pleased with the crystal clear display and having seven extra inches makes a huge difference.
However, with a new monitor comes thoughts about accurate colours, brightness, contrast and the need for calibration. For playing games, word processing and watching movies many people wouldn’t be too bothered if their monitor was too bright or too dark. To photographers it’s a major concern. If your prints are looking darker than the images on your screen there’s a good chance your screen needs calibrating. This website gives good information about the subject of monitor calibration – ‘Why are my prints too dark?‘.
Now, I’m a photographer who likes to play around with my images in post-processing. I will very often change colours, add cross-processing, warm an image up, cool it down, convert it to black and white, or deliberately use a different white balance setting if I prefer the look it gives. I’m not hung up on ‘perfect’ colours for my finished images, however I do like to start with an ‘accurate’ base image for taking into RAW conversion. And that’s where monitor calibration can help.
With the new Dell monitor setup I have spent the last few days reading various websites and doing test prints. I checked example settings on the Monitor Settings Database and I came to the conclusion that the default brightness setting for my new screen was quite probably too bright.
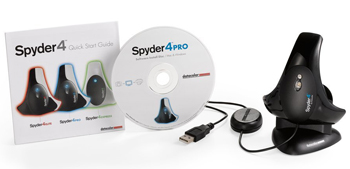
Datacolor Spyder 4 PRO
To help set my mind at ease I invested in a new screen calibration device. The reviews on Amazon persuaded me to choose the Datacolor Spyder 4 PRO.
Installing and using the Spyder 4 PRO is a doddle. Plug the Spyder sensor into your computer’s USB port and hang it over your screen using the supplied counter-weight. The on-screen software wizard takes you through each step. The Spyder measures a series of colours on the screen and you should have a calibrated display in just a few minutes. Once the calibration process has been completed you can save the new profile and also use the ‘switch’ feature in the Spyder 4 PRO software to compare how your monitor looked before calibration and how it looks now. The first time you do a monitor calibration the results can be very surprising.
Before and After Monitor Calibration
So, here’s how my Dell UltraSharp U2412M LCD monitor fared with the Spyder 4 PRO calibration.
Factory Default settings were:
Brightness: 75
Contrast: 75
Luminance: 126 cd/m
Colour Temperature: 6500K (Native)
My new calibrated settings are:
Brightness: 45
Contrast: 75
Luminance: 110 cd/m
Colour Temperature: 6500K (Native)
As you can see from the figures, the brightness has been taken down 30 points, along with the screen luminance (which I set to 110 as I usually edit images in a darkened room).
When I ran the ‘switch’ in the Spyder software to compare my new calibrated display with the default factory settings it showed that the original display was brighter and had a slight blue colour cast.
One last point that is worth noting is that screen calibration is an ongoing process. You shouldn’t just calibrate once and then forget about it. Over time most monitors will experience colour shifts. The Spyder 4 PRO software allows you to schedule regular alerts to remind you when it’s time to re-calibrate, eg weekly, monthly, etc.
Conclusion
On the whole, I’m now feeling much happier with my new Dell UltraSharp U2412M LCD monitor and feel I made a good choice with the Spyder 4 PRO screen calibration system.
If you are looking at your prints and wondering why they are too dark or too bright than what you see on your screen, it’s probably that your monitor needs calibrating. Click here to check prices and read reviews of monitor calibration devices on Amazon.
I said earlier that I like to experiment with my post-processing. I’ll finish with a photograph of Mel B, where I deliberately processed it with a Tungsten white balance setting to introduce a blue look to the whole image, just because I liked it (click to enlarge).
Thanks for reading and do please feel free to post a comment below.


